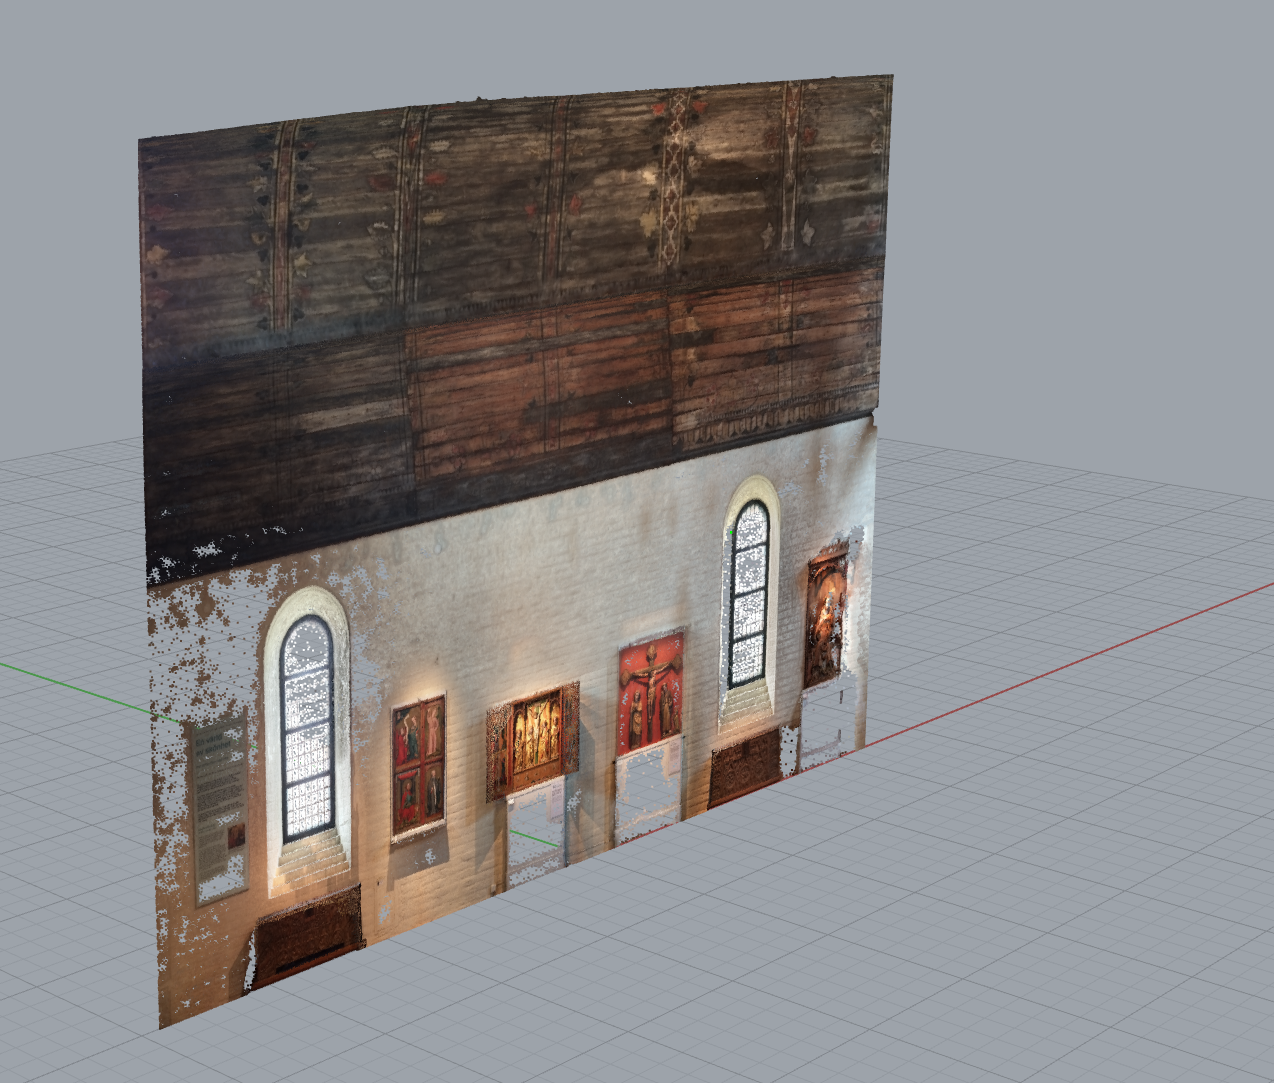
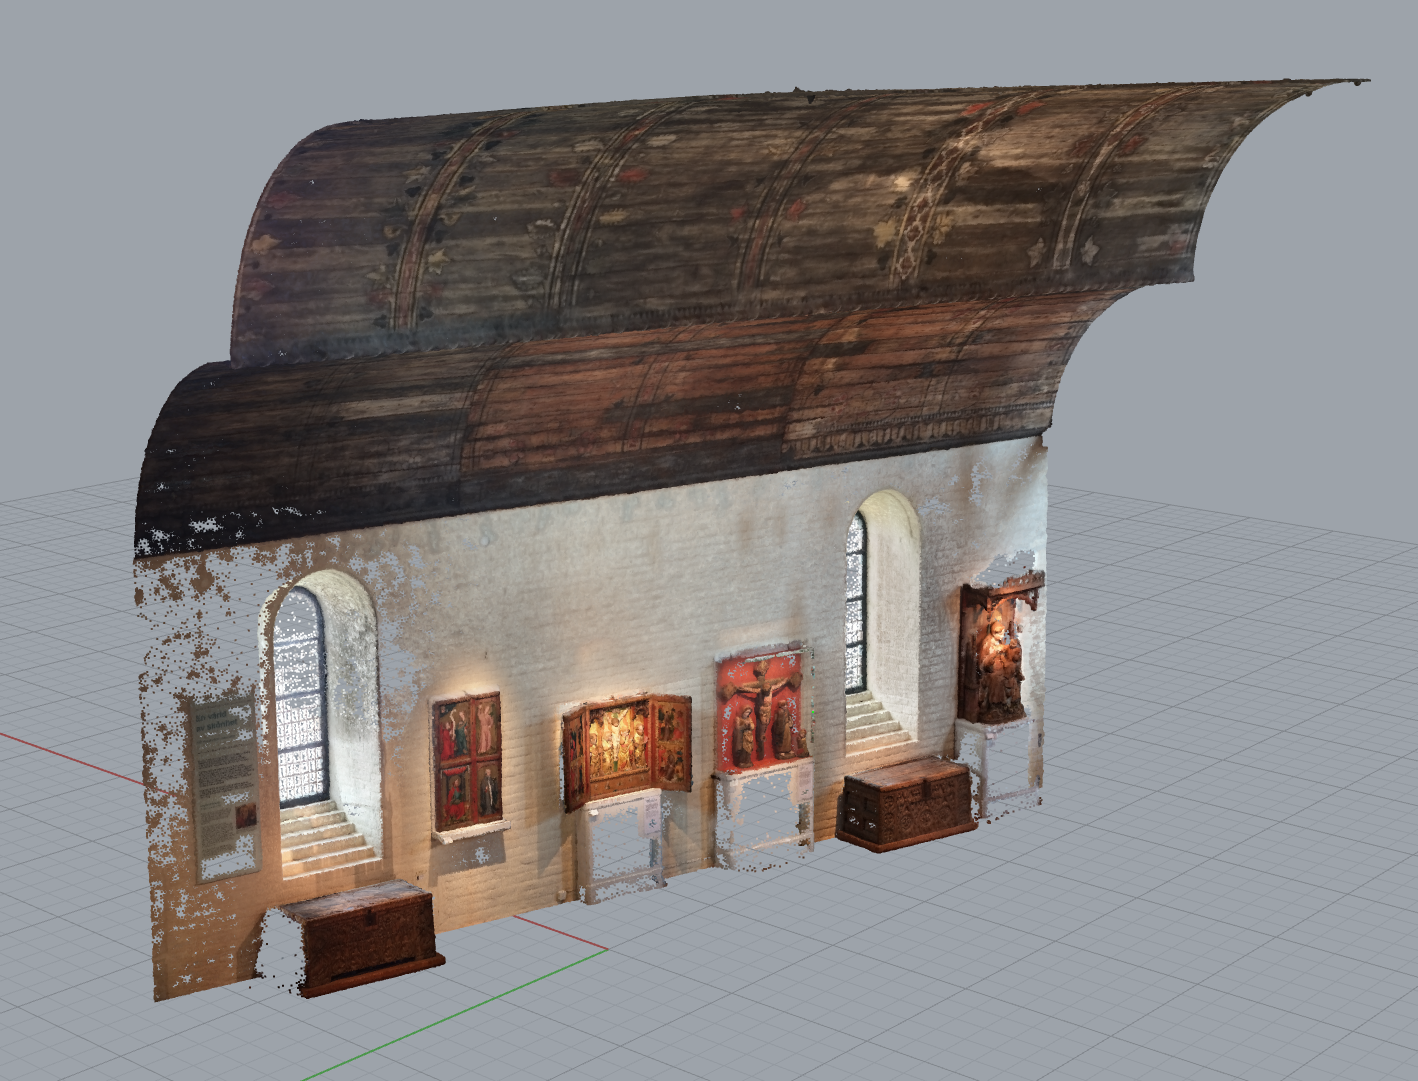
This very short tutorial briefly covers how to flatten a point cloud in Rhino with Grasshopper.
The purpose of this is to create a 2D version of the point cloud which is suitable for closest-point-operations meant to sample only in the direction of projection. The Grasshopper plugin Tarsier is used for this.
If you already have a correctly oriented point cloud, please click here to jump down to the final step.
Import the point cloud per previous tutorial.
With Point snapping checked (in the lower left pane), Move the point cloud and select a suitable point for the origin.
When you have selected a suitable point, enter 0 as the move-to location. This will move the point cloud so that the designated point is situated at 0,0,0.
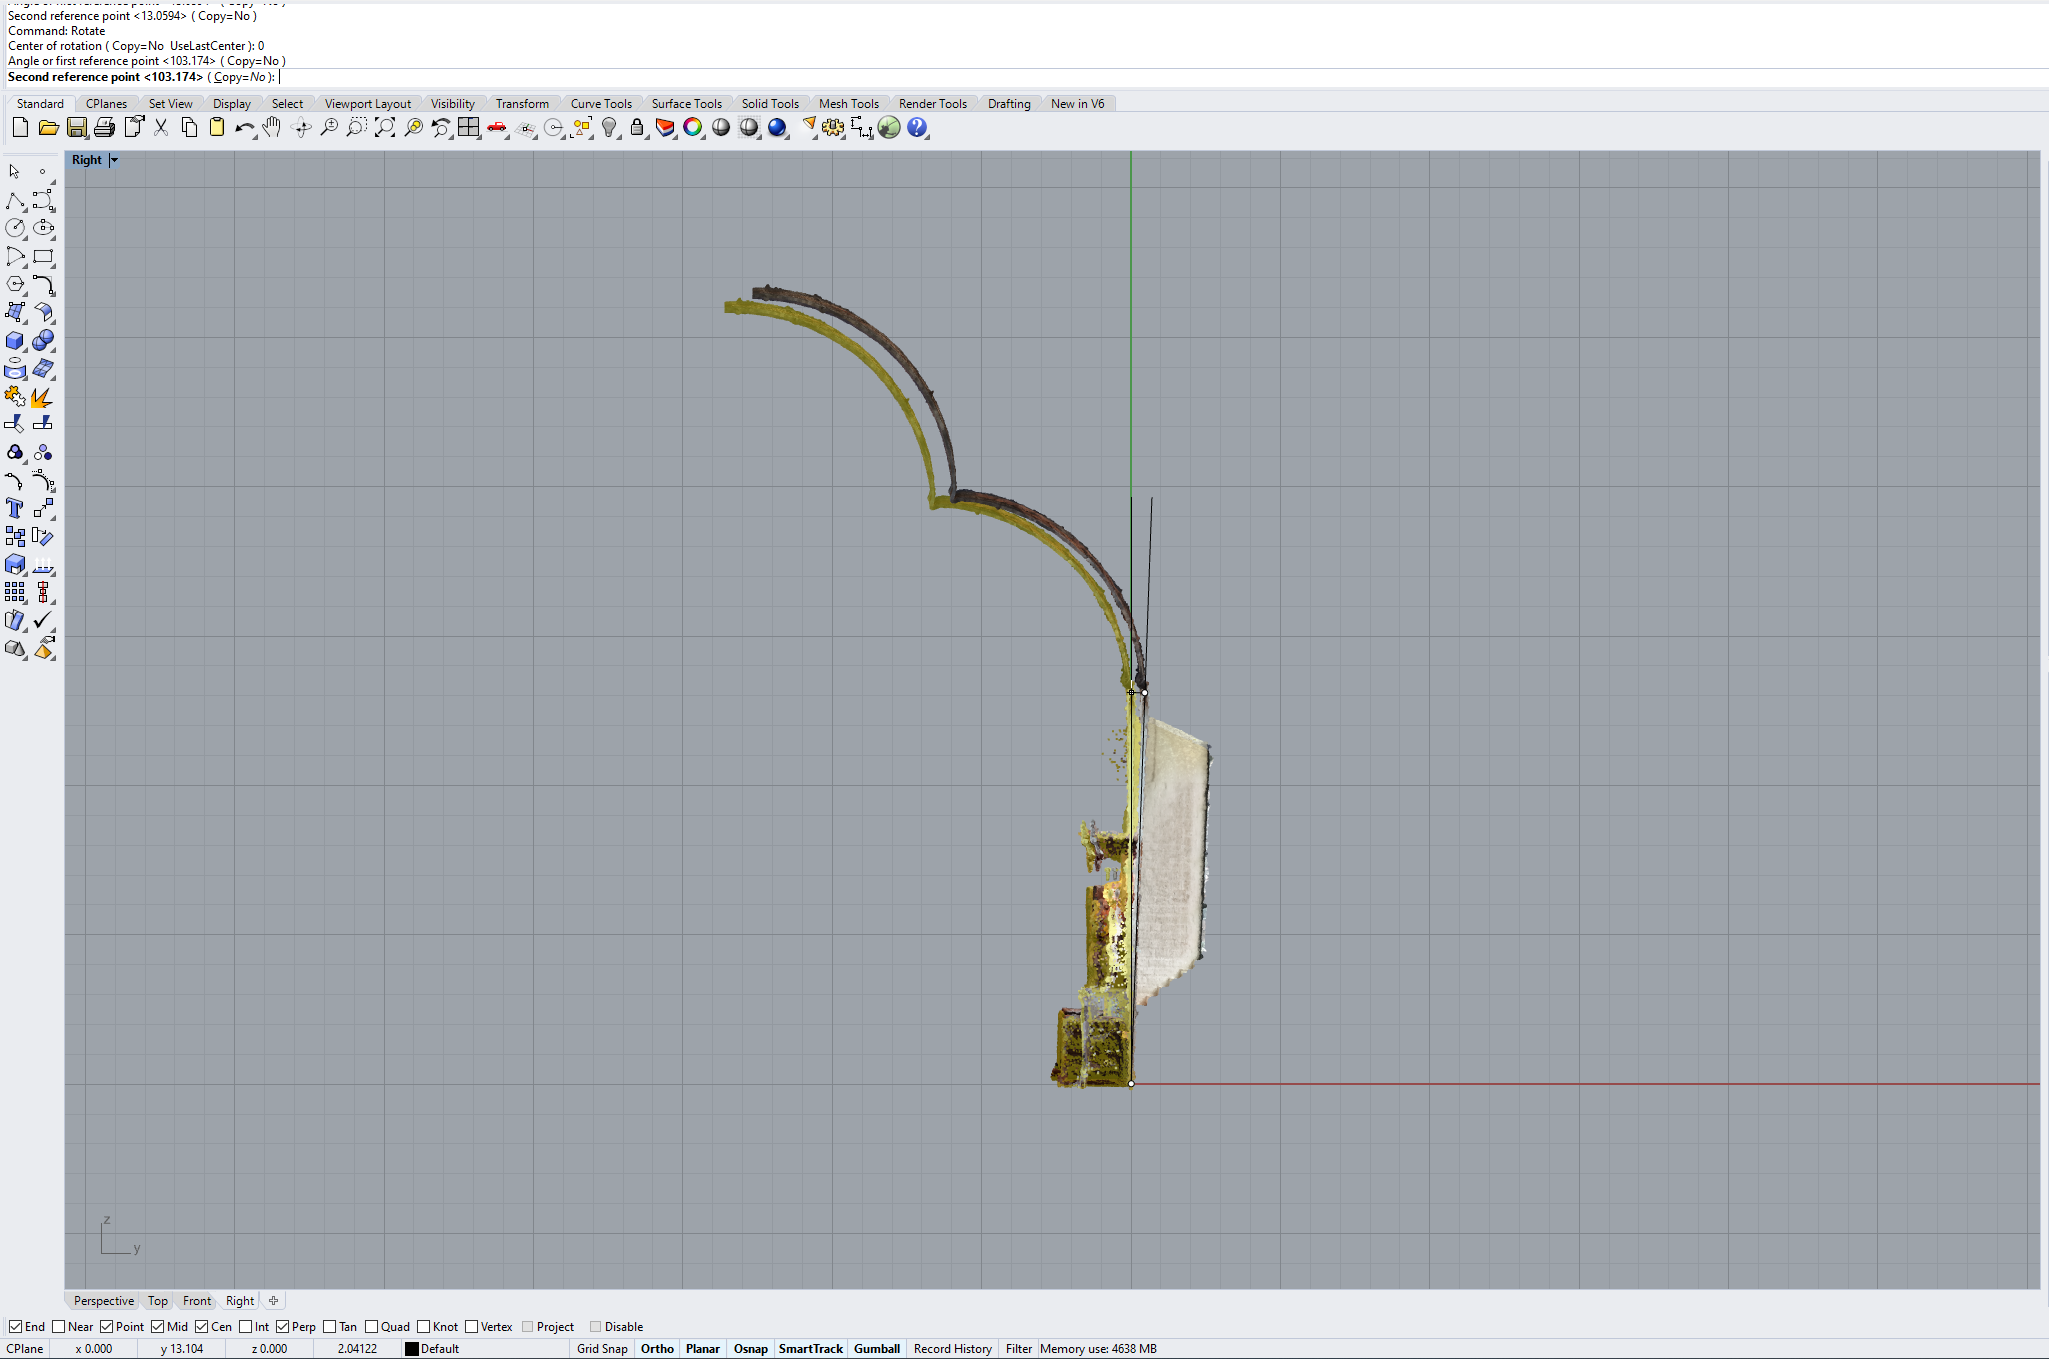
Rotate the point cloud around the Z-axis (i.e. while being in Perspective or Top view) so that the perceived front of the point cloud is oriented towards Y-. Enter 0 as the Center of rotation so as to make sure to rotate it around the origin. Pick any point which is co-aligned to the intended plane of the origin as the First reference point. With Ortho active (either hold SHIFT or click the button to activate it), confirm the rotation which orients the point cloud correctly for the Z-axis.
Repeat for the other axes. Rotate while in the Right view to rotate the point cloud around the X axis.
And while in Front view, Rotate the point cloud around the Y axis.
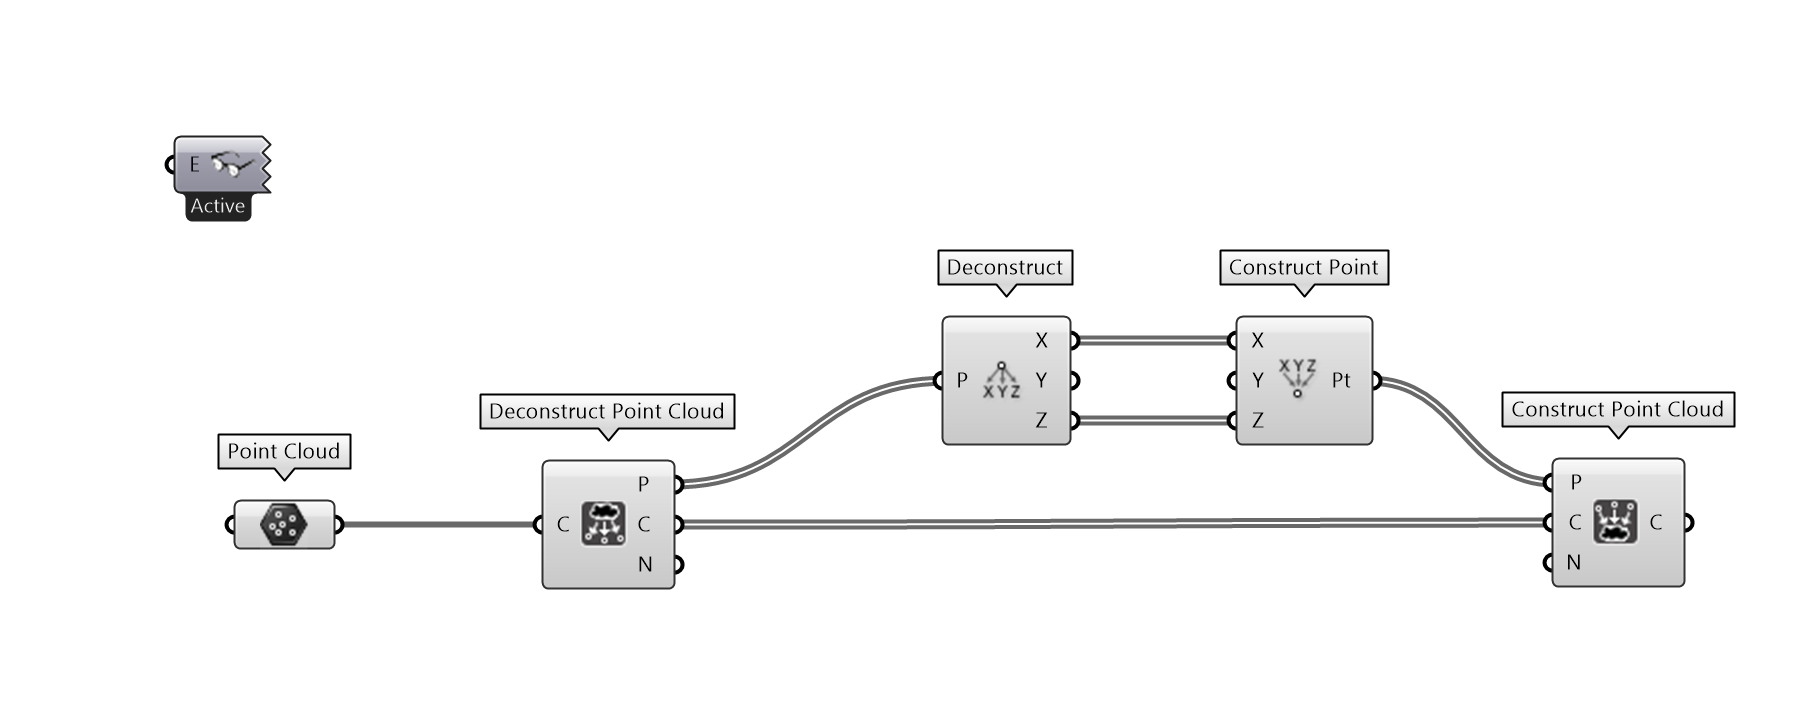
In Grasshopper, replicate the above definition (RMB-click and Open image in new tab to see full resolution, or download the GH 1.0 file here) and select the point cloud as a reference in the Point Cloud node (RMB\Set one PointCloud). You may then bake out the flattened point cloud by RMB-clicking on the output of the node Construct Point Cloud. If you have not installed the Tarsier yet, please download the plugin here.
This will bake out the flattened point cloud, for you to continue operations on (such as closest-point operations for a projected surface grid) or enjoy in its own effect.
If you encounter any issues, please write a comment below, and we will do our best to solve the problem.
If you would like to return to the overview of our tutorials, please click here.


